

Add a client via intake
Add a client via intake
An intake allows you to send a complete registration form to a client, automatically adding them to your environment with the information they enter themselves.
This intake can include, among other things, the following:
Client information - All of the client's personal details, including the mobile number, which is entered separately from the telephone number. This is the same screen you would see if you added a client normally. The name and email address will already be filled in when the intake is created and cannot be changed through the form.
You can also choose whether animals can be added directly during the intake. The client can then add up to 10 different animals. If specified when creating the intake, a report can also be added automatically for each animal. For example, you can attach an anamnesis form containing fields that are not available in the standard form.
Animal information - All information relating to the animal. This is the same screen you would see if you added an animal normally.
Report per animal - If specified, a report is added to the intake for each animal. These contain exactly the same fields as those you specified in the template.
At the end of the intake, the client always has the option to add extra information if they have any additional information available.
A client who is still completing the intake is, despite the

label, fully available as a regular client. This means that appointments, reports, and invoices can be created under this client's name as usual.
Create intake
To create an intake, go to 'Clients' in the menu. In the top-left corner, there are two buttons: 'Add client' and 'Via intake'. For the intake, use the second button.
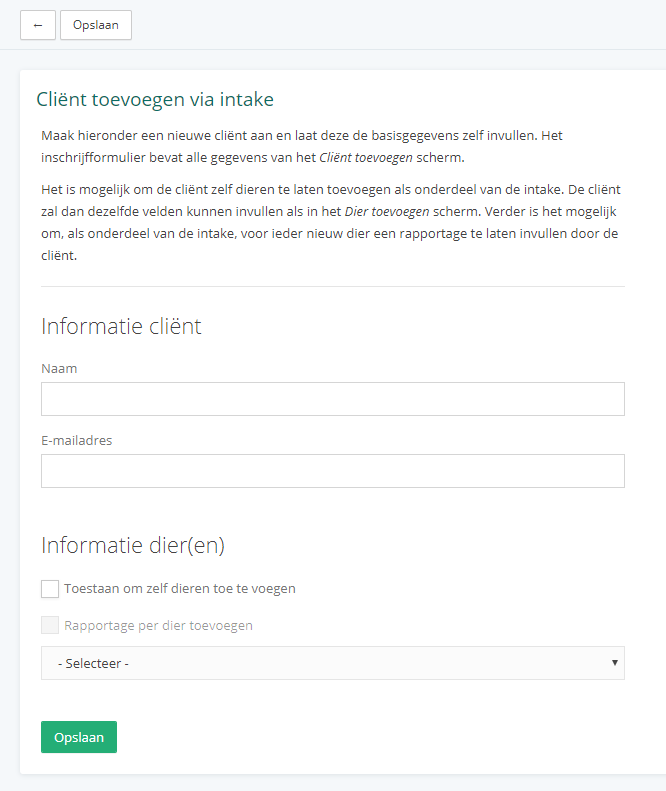
Here you can select everything you need for your intake. A name and email address are required because they are used to send the intake.
Once everything has been completed and you have clicked 'Save', a screen will appear where you can choose how you want to send this intake.
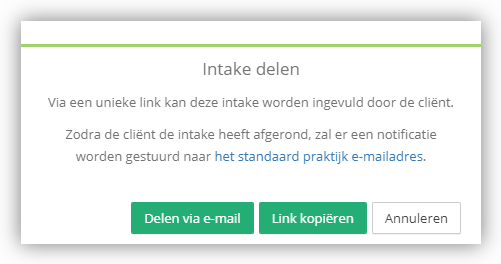
When sharing it, you receive two important things: a unique link to this intake and a corresponding personal code. The client needs both of these to complete the intake forms.
Terms and consent
The intake can include a checkbox that allows the client to accept the terms and conditions. You configure this as a consent item under 'Settings → General → Terms and consent'.
Under 'Visible to', select 'Client (Intake)' and set 'Required' to 'Yes' if the client must accept the terms and conditions before they can submit the intake. You can configure the text next to the checkbox under 'Text next to checkbox'.
For the client, this appears as a separate 'Terms and consent' step in the intake, where they can read the terms and select the checkbox.